
WordPressからメールを送信する必要がある場合ってありますよね?
今回は「sendgrid」を使用したWordPressからのメール送信設定をシェアします。
【sendgrid】側の設定
(1) 以下のサイトにアクセスし、アカウントを作成します。

SendGrid Email API and Email Marketing Campaigns | SendGrid
Send at scale with SendGrid’s trusted email API and marketing campaigns platform, delivering 148+ billion emails for senders like you every month.
sendgrid.com
(2) 「SendGridにようこそ!」というメールが届くので、指示にしたがってログインします。
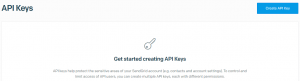
(3) 「Settings」→「API Keys」を選択し、「Create API Key」をクリックします。
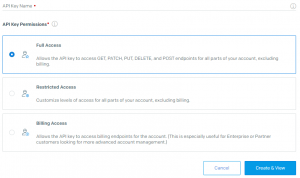
(4) 「Full Access」「Restricted Access」「Billing Access」の中から、「Full Access」を選択し、「Create & View」をクリックします。
(5) 表示されたAPIキーは、忘れずに控えましょう。
(6) 「Settings」→「Mail Settings」を選択し、以下の2箇所を設定します。
「Address Whitelist」にドメインを設定
「Forward Bounce」の「USE THE FROM ADDRESS」をチェック
【WordPress】側の設定
(1) 以下のサイトからsendgridのプラグインをダウンロードし、zipファイルを「プラグイン」に新規追加します。

SendGrid
NO LONGER MAINTAINED. Send emails and upload contacts through SendGrid from your WordPress installation using SMTP or API integration.
ja.wordpress.org
(2) 「設定」→「Sendgrid」を選択し、「API Key:」に控えたAPIキーを設定、保存します。
(3) 画面下の「SendGrid Test」からテストメールを送信して、届いているかを確認します。